If you’ve read my detailed review of the MSI Stealth Pro GS73VR (you can find it here, in case you didn’t), you should know that I decided to keep the 4k model, and order to make it more accustomed to my needs, I went ahead and upgraded some of the internals.
First off, the HDD had to go. I decided to replace it with my old 1TB Samsung 840 Evo. I also have a Plextor NVMe 1TB M.2 drive and 32GB of RAM to upgrade with. So basically because of how the motherboard is configured, I bought myself into completely disassembling the laptop – yay!
Before venturing on, you must know that myself or anyone else associated with Ultrabookreview.com can’t be held responsible or liable for any damage that you might incur on your unit during the upgrade process, so proceed at your own risk and only if you know what you’re doing!
I took some pictures along the way and I also have some tips for those of you who want to venture forward with this as well. I caution you in advance, this is a very time consuming process. It took me about an hour but it will probably take you longer, as I have done this numerous times with my old GS60. Give yourself 2 hours to be safe, and maybe longer if you repaste and you’re a rookie with that too.
The good news is that MSI GS63VR owners (reviewed here) can also follow this procedure pretty much to the letter. If you look at the pictures, the only real difference between the GS73’s and GS63’s internal architecture is the fact that the GPU fans are a little further apart and some of the other components are a little spread out on the larger unit. The motherboards are identical.
Make sure you give yourself a lot of room to work – I took up most of my kitchen table doing it since there are so many parts to move around. Depending on where you live, you’ll probably also want to make sure you’re properly grounded. Again, proceed with caution.
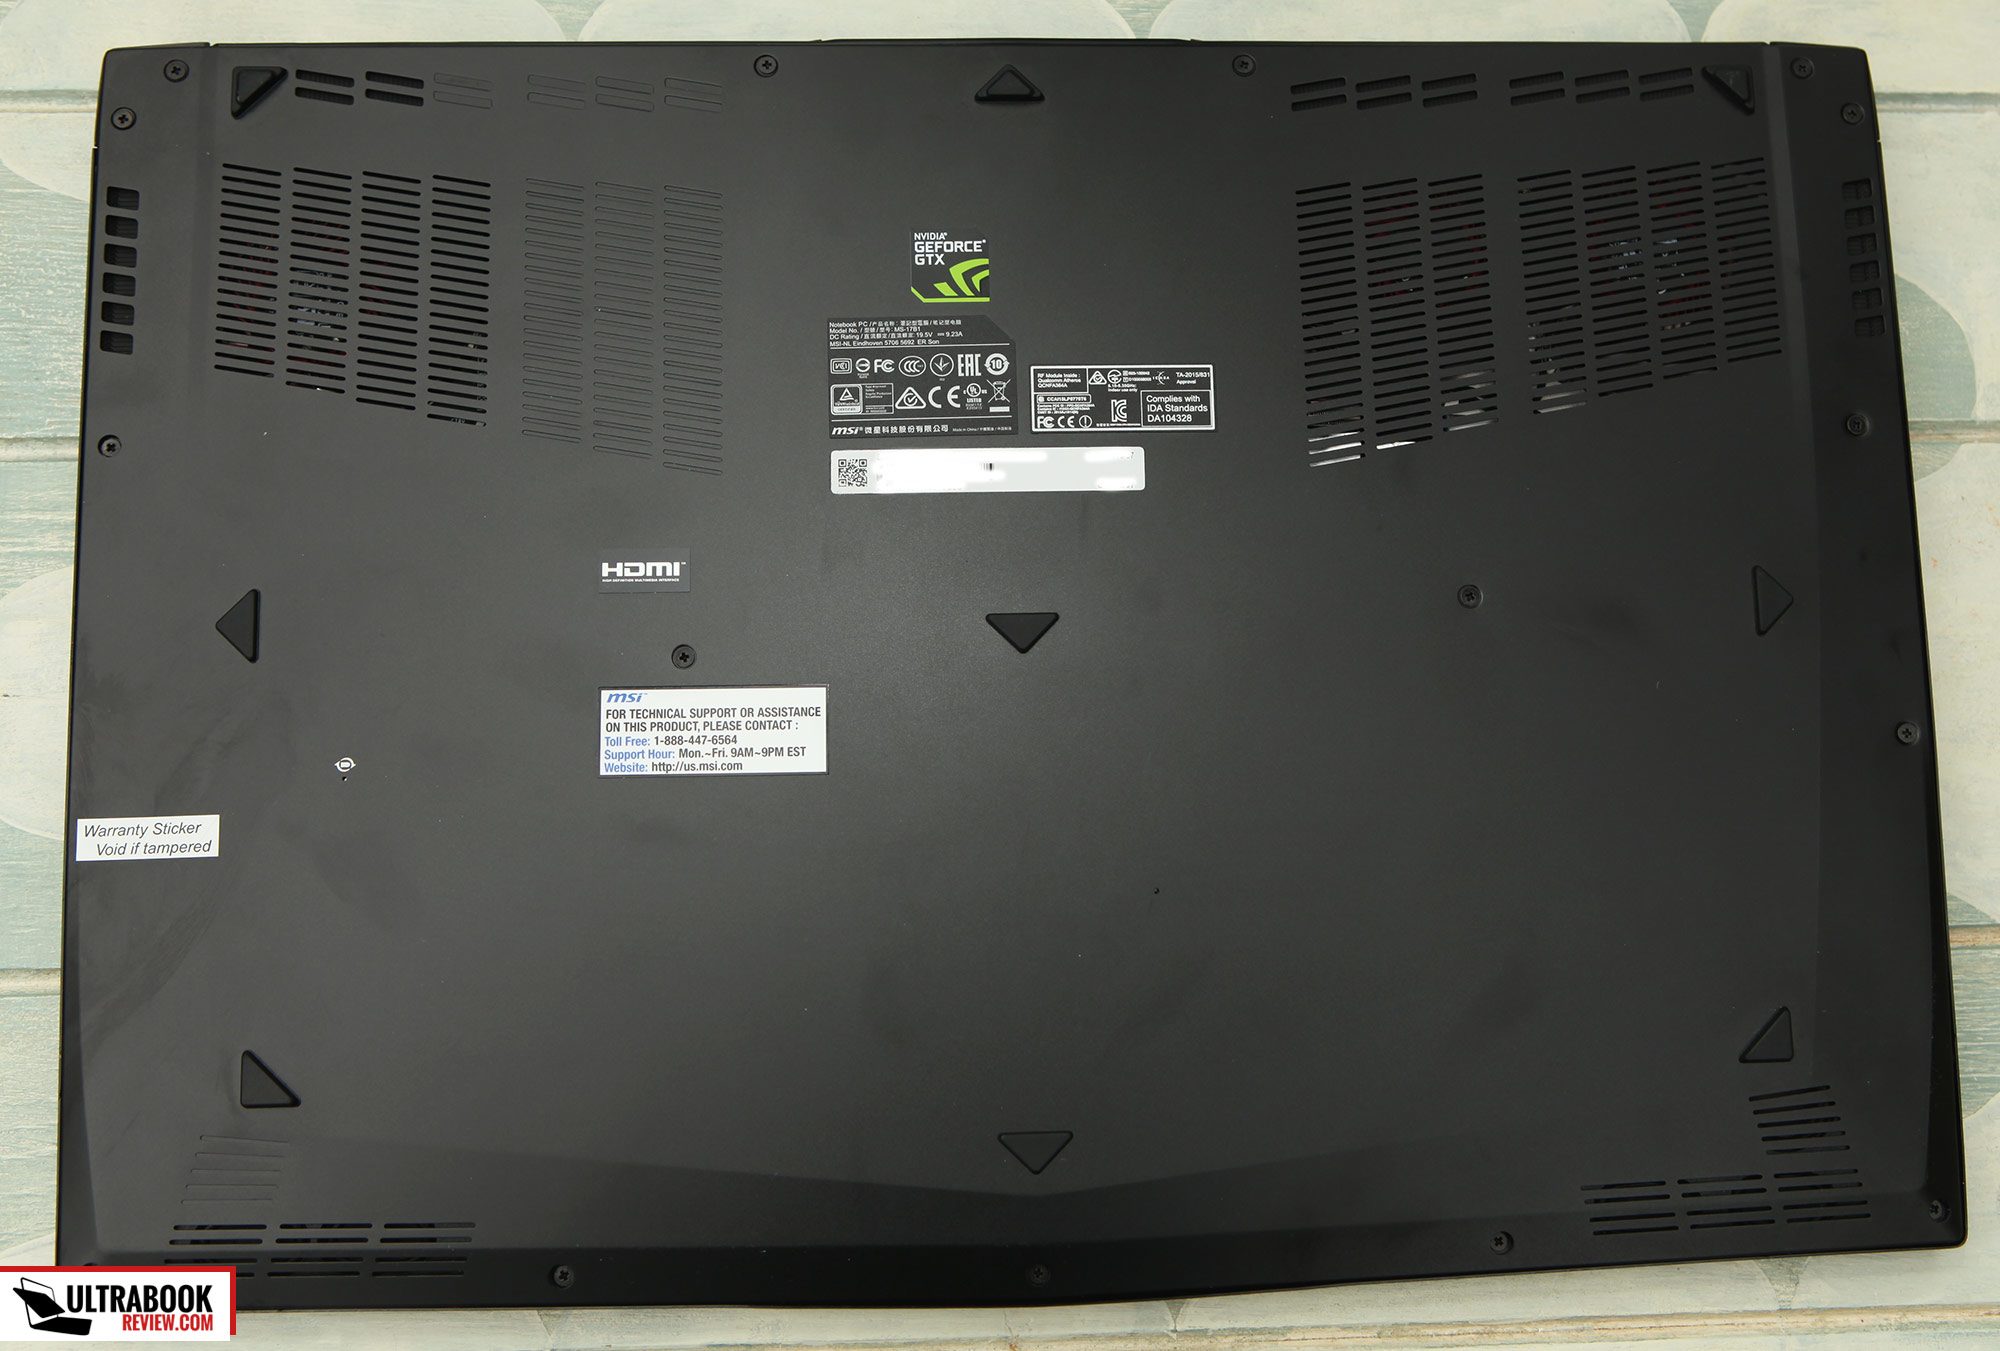
So here we go, the first thing you’ll want to do is remove the back cover. The warranty sticker is in the way, hiding one of these screws underneath, so that needs to come off. For US and Canada, this sticker doesn’t void the warranty, but if you’re anywhere else, know that by breaking this sticker your warranty is now void. If you don’t care about looks, break right through it. If you want to peel the whole sticker off though, you’ll want to heat it up with a hair drier or something to loosen it up – then it just peels right off. You can always do this after you get the cover off.
There are 17 screws to deal with and some of them are different lengths. I highly recommend getting a sheet of paper and drawing the laptop on it. Then use double sided or clear tape and put the screws where they belong on the drawing. If not for this step, do it for the motherboard for sure.
Once you get all the screws off, you’ll need a plastic opening tool, guitar pick or even a credit card to release the clips at the exhaust vents. Be patient here and start at the edges. Then work your way into the middle until the back panel fully releases. If you break a clip, it’ll probably annoy you from now on so you won’t want to mess up here.
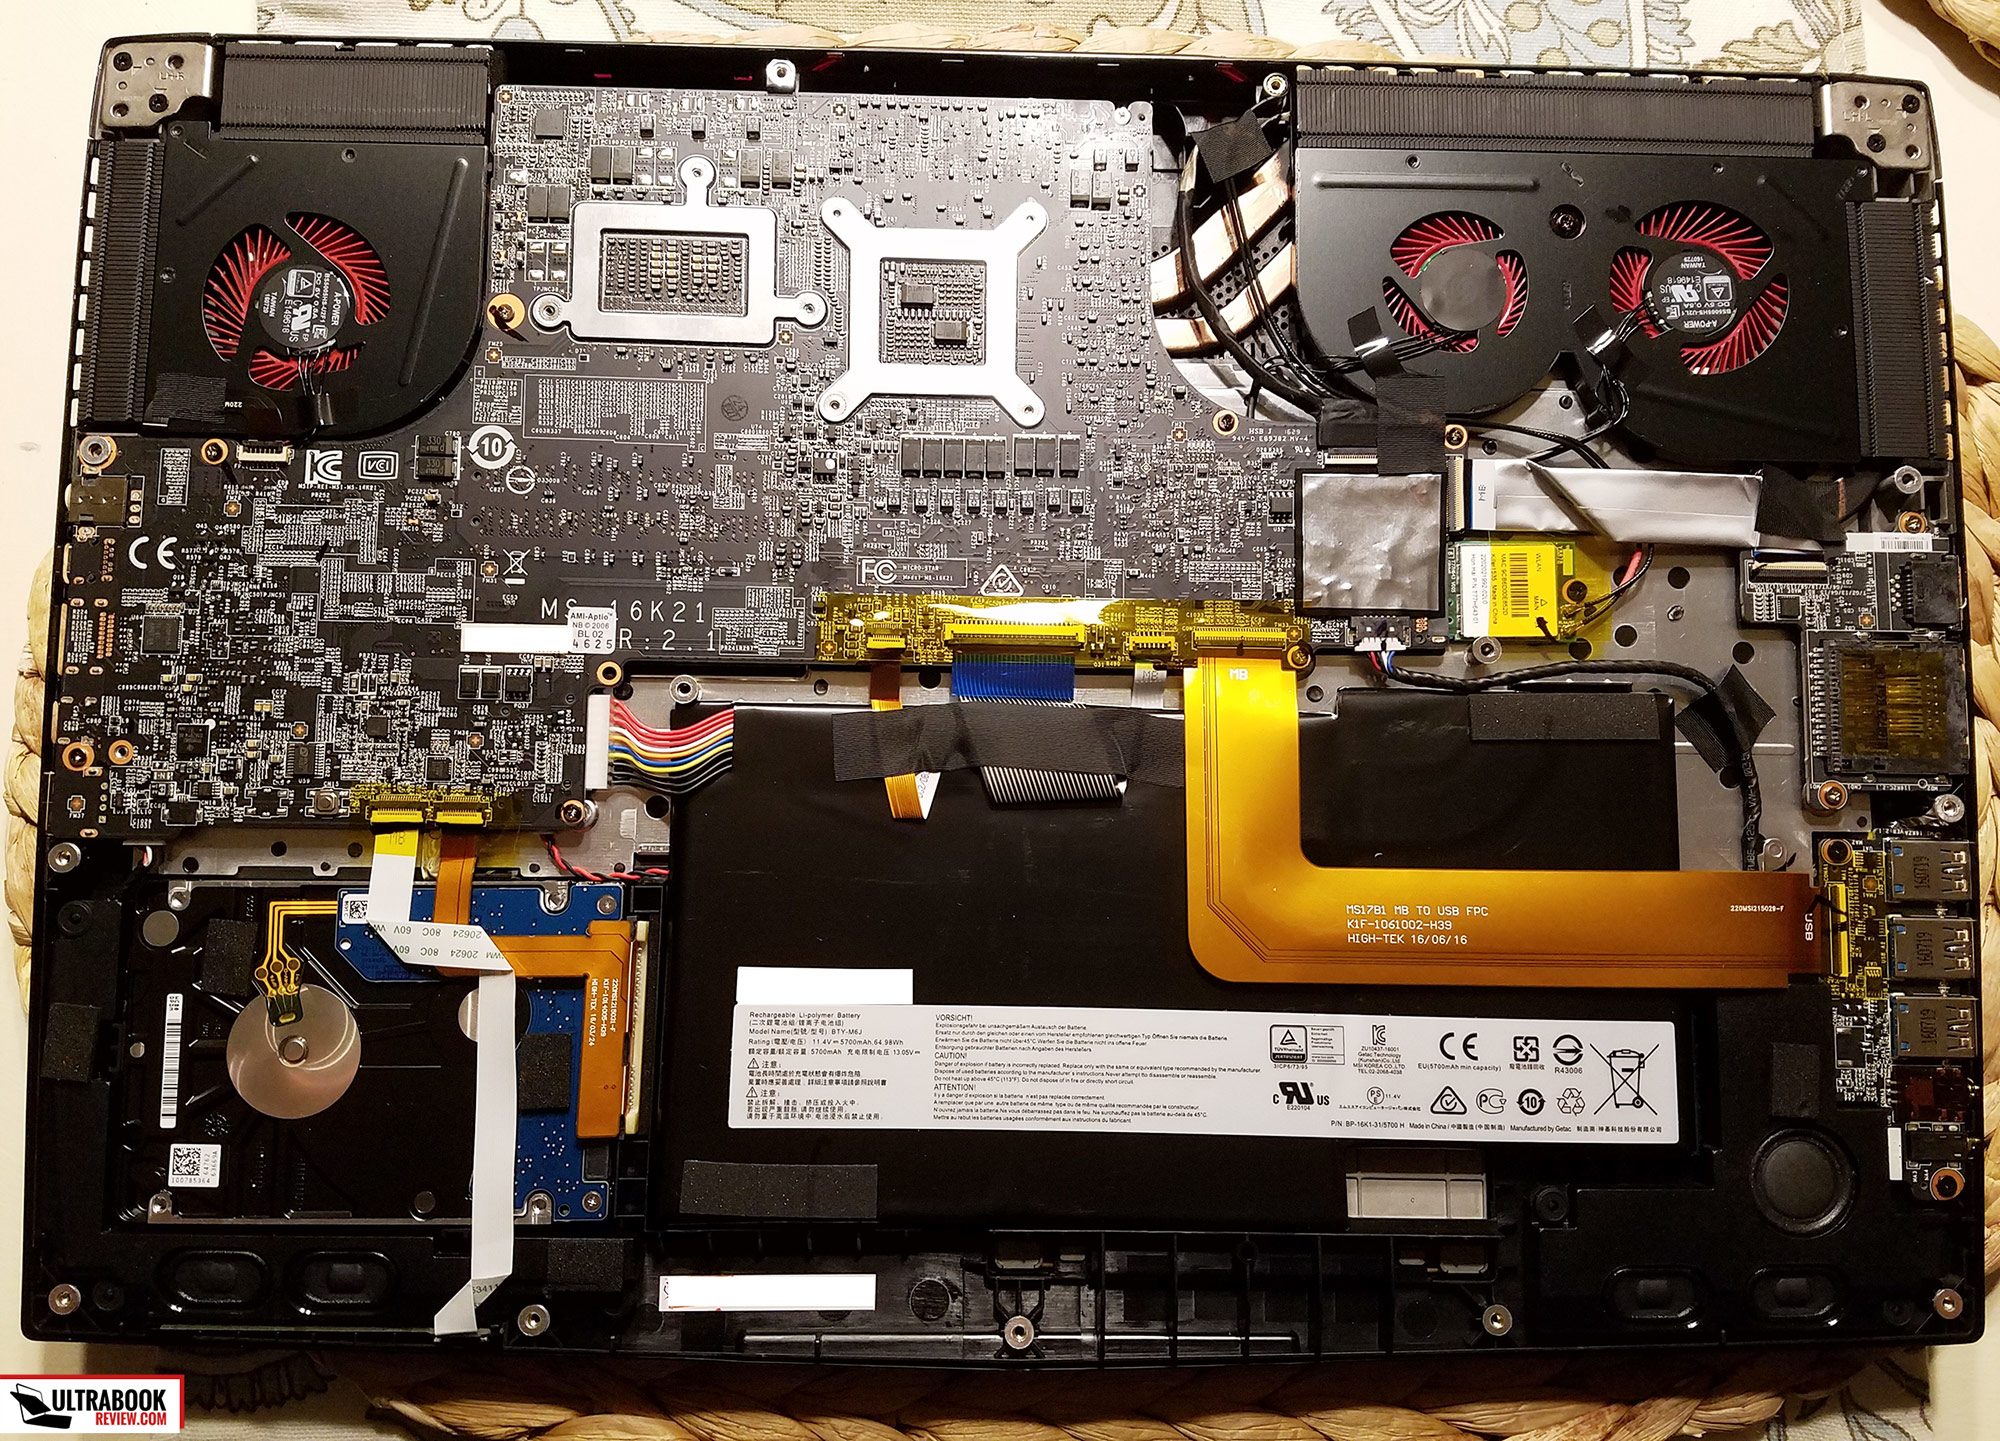
With the cover off, you’ll see the motherboard. The HDD is easily replaceable, but the rest is going to take some work. First things first is to work on the cables. There are 14 things to disconnect in total, including the Wifi module. Start with the battery and work your way around. Some of these are going to take some dexterity, especially the ones down by the HDD. Removing the HDD helps get to them easier though. That battery connector is also a tough one to pull out. I had to pinch my fingers on all the wires together and just pull it.
The ribbon cable connectors are pretty fragile so you really want to be gentle here. It’s pretty much a standard how to release them though – just carefully lift up on the plastic lever and it’ll rotate 90 degrees upward. Then the ribbon cables can be pulled right out. If you break one, it really sucks but it’s not the end of the world. You’ll just have to rely on tape to hold it in from now on. If you don’t have any Kapton tape, I recommend having some on standby.
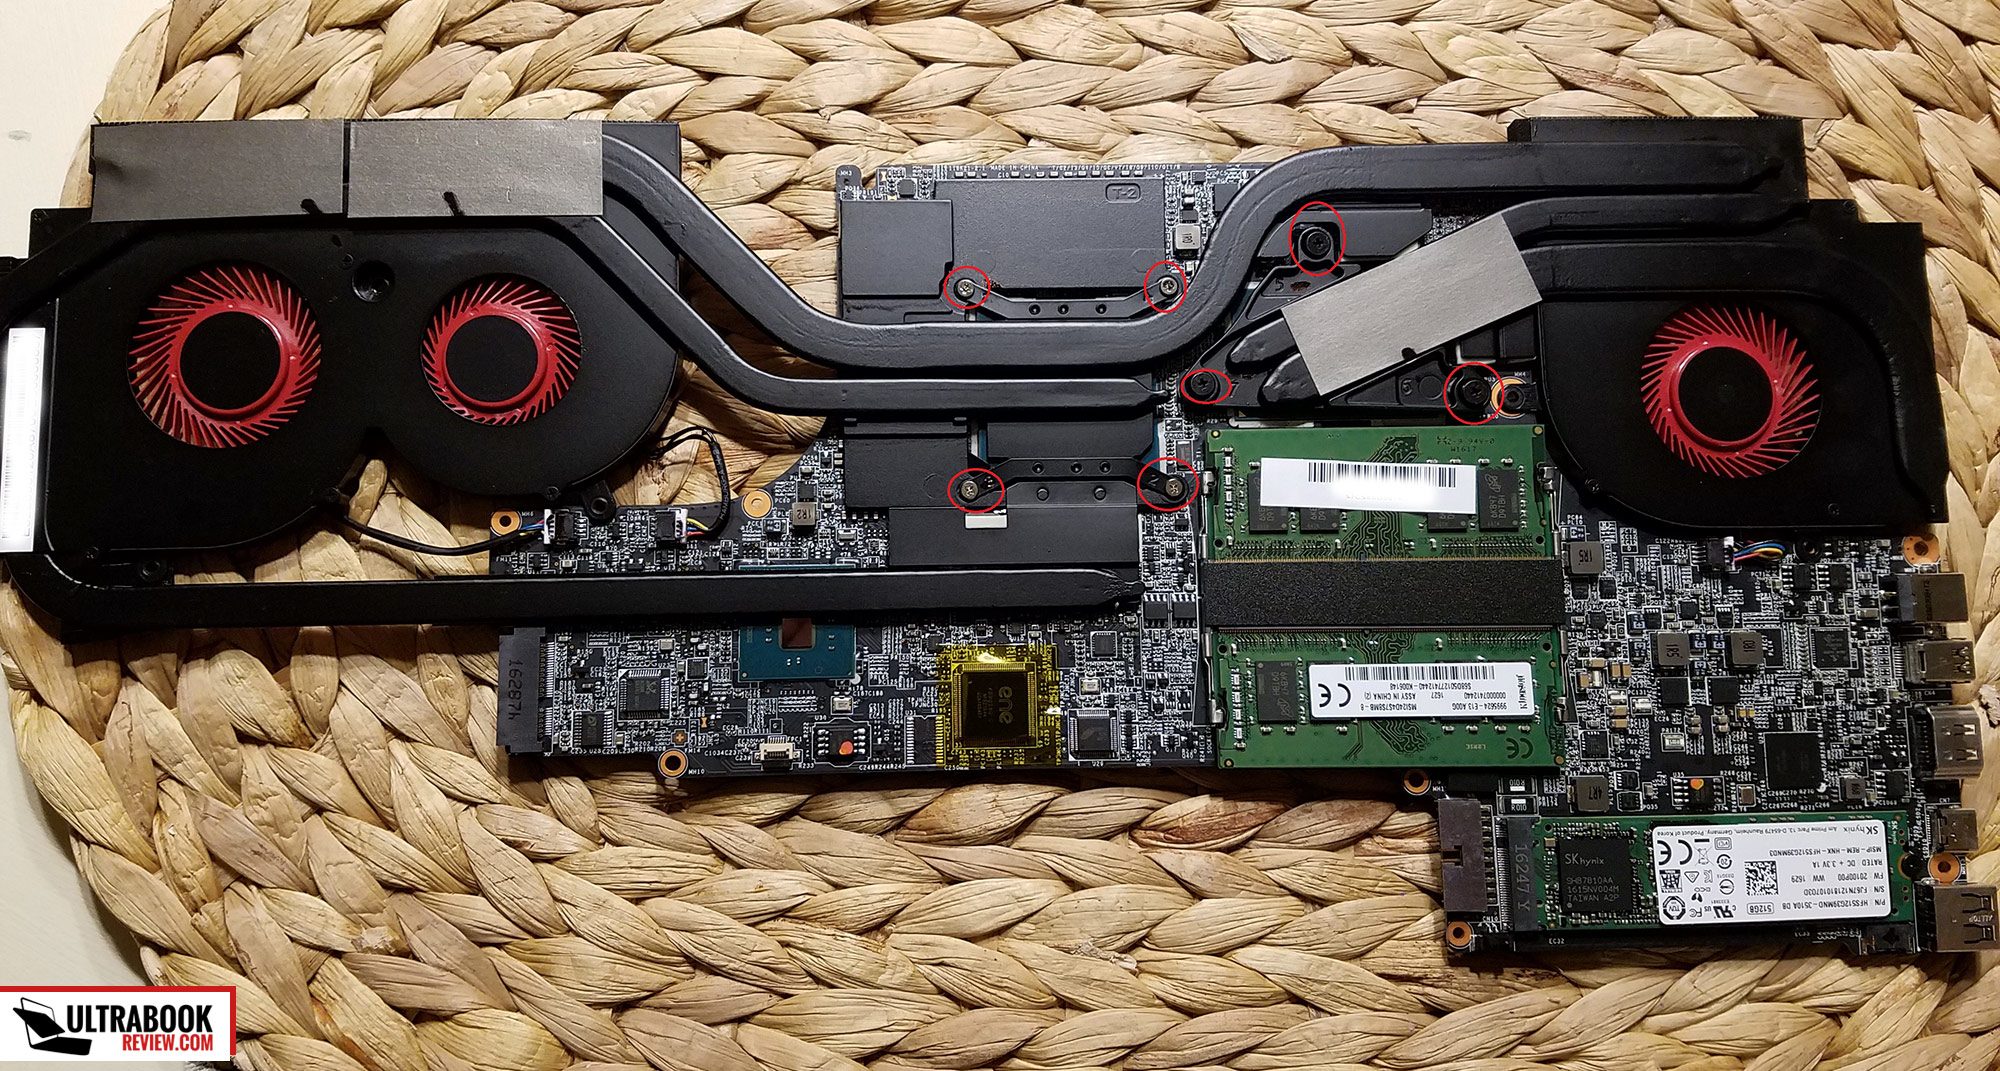
Next are the screws. There are 16 screws holding the motherboard down. One of those you already removed with the Wifi module. It’s very important you keep track of what screw goes where because many of them are different. Some are hard to see since they probably are surrounded by black elements and have black marker on them. Others are hidden behind tape. Once you get them all off though, the motherboard can now be lifted right off.
An optional step that might be necessary, especially for GS63VR owners, is to remove the memory card module to the right. On the GS73VR, it’s not really in the way but it might be nice to remove it to have extra space upon reassembly. If you do, it’s just 2 screws.
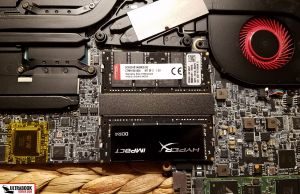
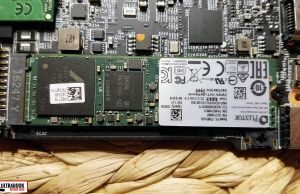
Now with the motherboard off, flip it around and place it somewhere safe where you can continue to work. The RAM modules and M.2 module are pretty straight forward from here. If you need help with these steps, I don’t know how you got here – seriously.
If repasting is your desire, this is where you’ll want to do it. Keep in mind, this pretty much breaks your warranty on the CPU and GPU. It’s a pretty straight forward task though, especially if you’ve done it before. The CPU has 3 screws and the GPU has 4. Once you get them all off, the heat sink pulls right off. This is different from the GS60 because the heat pipes are all interconnected though. Reapplying the heatsinks together might be challenging.
With the heatsinks off, use isopropyl alcohol and some lint free cloths to remove the paste. Remove it on the CPU, GPU and the heatsinks until everything is nice and shiny. Then apply your new paste according to their recommendations. These are probably rectangular in shape so you might have to do a thin line down the middle. I won’t go into too much detail with this because there are so many opinions on what’s right and wrong with each paste. There are plenty of other guides on how to do paste though, so I recommend looking at some videos if you’re not experienced.
Reassembly is pretty much everything in reverse. Double check all your connections and make sure all your screws are where they should be. I recommend doing a boot and a mini performance test before putting the back cover on. If it doesn’t power on, don’t panic just yet – you have to attach the power cord when powering it on for the first time after disconnecting the battery.
Hopefully at this point, everything is working. If so, reattach the back cover, put in all the screws and make sure the clips are clipped back in. You’re done!
Hope this helps someone and feel free to message me below if you have questions.







Joe
December 5, 2016 at 4:02 pm
Derek, Thanks again for the fast response. Im hoping the 960 drops in and after migration it boots up with no issues. Seems Im reading a lot of comments around with BIOS not seeing the 950s. But most were from 2015 and obviously on older boards and older BIOS. Yeah its only been a year but in tech age thats old lol. If all else fails I can do a fresh win10 install on it. I don't have much to lose on it since its only a few weeks old anyway.
Joe
December 5, 2016 at 4:03 pm
And thank you as well James!!!
Joe
December 6, 2016 at 4:37 pm
Just a quick update, I was able to clone my oem M.2 ssd over to my new Evo 850 after formatting it. Using the Samsung Migration Software that came with it. From there I installed my new Samsung 960 pro. Unfortunately Samsung migration wouldn't recognize it even after formatting it. So I first tried EaseUS and it kept saying not enough disk space. So I used macruim reflect instead. It worked great and only took 9 minutes. From there I wiped the Evo 850 so it no longer had the clone on it and everything booted fine. All system files and installed software works fine. The only thing needed now is to extend the OS volume on my 960 to fit the 11gb that is still unallocated on it. Best part is my oem M.2 ssd will be available just in case my system crashes.
Just wanted to tank you guys again for the great info and tips for getting this done. Very much appreciated!!
Philippe Bekaert
December 11, 2016 at 11:38 am
thanks for these great instructions. They helped a lot. I replaced the NVMe drive on my GS63VR with a 1TB samsung 960 pro and the SATA drive with a 2TB samsung pm863. Everythings works and I have no screws left after reassembling (:-), except for the USB3 ports. Any suggestions what I could have been doing wrong, or what to check ? Thanks! Philippe
Philippe Bekaert
December 11, 2016 at 11:40 am
oh … the USB3 ports do offer power and work with USB2 devices, but not with USB3 devices (in particular hard drive). They do get power, but no data connection. Thanks. Ph.
Derek Sullivan
December 11, 2016 at 11:51 am
Did your hard drive work before? Sometimes hard drives need that second USB connection in order to work properly. Do you have a USB3 thumb drive or anything to test?
I can't imagine what it would be. If I remember correctly, there's only a single header that connects the USB to the motherboard. It might be worth it to try disconnecting and reconnecting it.
Philippe Bekaert
December 11, 2016 at 3:34 pm
That solved the problem indeed: the wide golden ribbon cable connecting the USB3 daughter board didn't stick in far enough. I eventually removed the battery to get a better grip on it and insert it properly. The battery is glued but comes loose when pulled gently.
Thanks again!
Ricardo Medina
January 10, 2017 at 4:33 pm
THAnk you!!! You dont have the idea how helpful you were!
John
April 13, 2017 at 8:59 pm
Hi,
I've found a good price for 2666mhz Kingston HyperX Impact RAM. Would that work in this system instead of the 2400mhz?
Thanks :)
Derek Sullivan
April 14, 2017 at 8:44 am
It might work but it probably would not run at 2666mhz. Technically the CPU supports up to 2133mhz, but I've found 2400 works fine with this CPU. There's no bios setting for the RAM so it's only going to run at what MSI supports it for.
John
April 14, 2017 at 9:34 am
Thanks Derek,
If you have a moment I was wondering a few things with the GS73VR 7RF (FHD 120hz)
I was planning to use a 960 PRO V-NAND NVMe PCIE M.2 1TB as the primary drive… then a 850 EVO SATA III 2.5inch SSD 4TB as my main storage drive.
Id swap out the RAM for Kingston HyperX Impact DDR4 – 32 GB: 2 x 16 GB – SO-DIMM 260-pin.
If all that would work..?
I'm hoping to have a beast of a machine, I shouldnt have to upgrade again for a good few years. I just hope MSI build quality lasts that long :)
Derek Sullivan
April 14, 2017 at 3:00 pm
That's actually the same setup I have except I have a 2TB SSD instead of 4TB. It's great! As for longevity, I think it'll last a few years. The hinges are always the unknown point on laptops, but considering they are metal and held by two screws, I think they'll be fine. The laptop itself is also mostly metal, so as long as take decent care of it I think it could easily last that long. Good luck!
John
April 14, 2017 at 10:44 pm
Hi Derek,
Glad to know I made all the right choices in picking my upgrades :)
Thanks for the help, will let you know how it goes.
John
MSYR
December 18, 2017 at 5:09 am
wooow perfect :)
You finally upgraded
Ernest
September 7, 2017 at 9:29 pm
What is your opinion on need for a thermal pad with nvme ssd. Have a my digital bpx 512gb nvme on order. Msi website acts like there can be heat problems.
Derek Sullivan
September 10, 2017 at 9:03 pm
Depends on the drive. I usually put one on just in case. They are pretty inexpensive and are better than nothing. Don't worry about putting them on top of the stickers – they will still work better than having nothing at all. A lot of SSD manufacturers will void the warranty if you remove the sticker.
Jeff Alberts
September 11, 2017 at 8:53 pm
Thanks for this write up.
I've had my GS63 for a couple weeks now, and have purchased 32gb RAM to upgrade. Didn't realize how difficult it would be. So, thanks to your post, I can wait until I have some time and make some space on my desk to dig in.
Derek Sullivan
September 11, 2017 at 8:57 pm
You're welcome! Glad to see this is still useful to everyone.
John
December 20, 2017 at 11:47 am
Hello,
I damaged the wireless adapter connector and possibly the antenna cables connectors. The model of the wireless adaptar is Intel AC m.2 8265 NGW. I bought new wireless adapter but the connector from new card does not fit in antenna cables. I need to replace the antenna cables too, but, it looks like hard to open the place where the antenna cables are located in MSI GS63VR 7RF model.
Anybody can help me?
Derek Sullivan
December 20, 2017 at 2:26 pm
Hi John,
The antenna cables are pretty much universal, so I'm guessing they don't fit because they are damaged. Just how bad is the damage though? Those things are usually pretty durable. I forget if the wifi cables go up into the display on this model – they usually do. It's an all metal lid though, so they might have tucked the antenna under the plastic portion of the hinge. Once you find the other ends, all you have to do is replace the cables. You can get those pretty much anywhere for under $10
John
December 20, 2017 at 9:06 pm
Hi Derek,
The antenna cables are located below motherboard and above the keyboard. it looks like hard to open this place. Look: https://imgur.com/mVLbXXo
I need a tutorial to open this area.
Yes, I need to replace the cables.
But, first, I need check the other ends, to buy a correct cable.
Thank you Derek!
Derek Sullivan
December 20, 2017 at 9:30 pm
The picture is blurry when I zoomed in so I can't really tell where those cables are going. Those vent holes are the bottom of the casing though, so if it's not obvious where the wires lead, they probably bundle with the monitor cable and go into the screen bezel, through the right hinge. That's going to be a difficult repair… If it were me, I'd try and reassemble with only one antenna attached to the WiFi card and see how it works. It might be fine. You could also buy the other wire and just attach it to the backside of the red stealth logo. That area is plastic and should still be able to pick up signal. There's no rule that it has to be in the display. They only put it there because it's higher.
John
December 21, 2017 at 11:03 am
Good idea Derek. But, it's fine keeping two pairs of cables inside? Or the best thing is remove the damaged pair cable? I'll try to attach a new cable in backside of the Stealth Pro logo. Any update I post here.
Derek Sullivan
December 21, 2017 at 11:06 am
It's fine to leave them in there. They're just wires and won't hurt anything to leave them. Probably best to leave them because splicing in new connectors might be a viable plan B. So are both damaged or is it just one?
Jerry
January 4, 2018 at 5:19 pm
Hi Derek,
Today the CPU fan on my GS63VR started rattling and making a lot of noise. It was still under warranty, so MSI support said they'd send a new fan, as it should be simple enough to replace and that it'd be faster than sending the laptop in for repair.
Do you know if this will require disconnecting all the ribbon cables and taking out the motherboard? I'm comfortable working with desktops, but I always feel nervous about messing with laptops–they're so much easier to break.
Thanks for this guide!
Derek Sullivan
January 4, 2018 at 9:42 pm
Yeah, unfortunately you do for this one. The motherboard is inverted so you pretty much have to do a full disassembly for pretty much everything except the battery and wifi module. If you haven't had them send it already, I'd just send it to them if you aren't comfortable doing it on your own. I personally like that they send out the parts for free and let you do it yourself – that's really good customer service in my opinion. But they also have a pretty good turn around time if you do decide to send it to them. I did it for my GS60 for a fan issue and I think it was only gone for a little over a week.
Jerry
January 4, 2018 at 10:16 pm
They told me they didn't have any on hand, so it would be easier for them to just send the part to me once it came in.
I'll probably just warm up by messing around with a broken laptop I have on-hand. Looking through your guide, I'm feeling pretty confident, especially with the figures where you circled all the connections and screws–as long as the fan unit is only secured by screws, like the tech told me over the phone.
Derek Sullivan
January 4, 2018 at 10:58 pm
It's really not that hard. It's just tedious because all the ribbon cables are so small. Once you know how to unlatch everything properly, it's very easy. I was the same as you in my first one but now I am very confident to take apart pretty much every laptop I get. Good luck!
Ali Hazim
March 30, 2018 at 6:55 am
What are the size of laptop screws
Ali Hazim
March 30, 2018 at 6:58 am
I opened my laptop to clean it and after the completion of the installation I installed everything and everything works but the screen remains black does not work Why
Derek Sullivan
March 30, 2018 at 1:44 pm
Is the screen powering on to a blank screen or is it completely off? Have you tried disconnecting and reconnecting the screen ribbon cable?
Robert J Rosania
January 13, 2019 at 6:37 pm
I have this same issue, but my keyboard lights up red as well as the led showing the battery is charging.
Ali
March 30, 2018 at 1:35 pm
What size laptop screws msi gs73vr
Derek Sullivan
March 30, 2018 at 1:47 pm
I'm not sure but it's a safe bet to try M2x 3mm screws to start with. Those are very popular with many manufacturers.
Ali
March 30, 2018 at 2:09 pm
I opened my laptop to clean it, and after I finished cleaning I installed the wires in place and installed the cover, but when the device is turned on everything works and the screen stays black on boot. Why do you have information?
Derek Sullivan
March 30, 2018 at 2:17 pm
If everything else is working, the only thing it could be is the wire might be disconnected. Double check the connector and follow the wire to the top and make sure it's not pinched or cut anywhere.
Ali
March 30, 2018 at 2:47 pm
Screen how much wire it has?
Ali
March 30, 2018 at 2:56 pm
The wire is in its place and nothing has hit it
Derek Sullivan
March 30, 2018 at 3:47 pm
If you've tried disconnecting and reconnecting the panel wire and it still doesn't power on, I'm not sure what the problem would be other than a faulty panel. Are you sure the PC is working normally otherwise? Have you tried connecting to an external monitor and opening device manager to see if the laptop monitor is working?
Bruno Cantelli
May 7, 2018 at 10:55 pm
Officialy, MSI supports 32 GB RAM for Gs63VR-E (which is my case). Unofficially, can I go up to 64GB 2400 Mhz? About the M2 SSD, mine original is: HFS128G39MNC-3510A (ebay.com/itm/SK-Hynix-SC300-128GB-SATA-M-2-SSD-HFS128G39MNC-3510A-DB-/263305108884), in this case, I can se it is M2 and not NVME, Can I go for 860 Evo (amazon.com/Samsung-500GB-SATA-Internal-MZ-N6E500BW/dp/B078218TWQ/ref=sr_1_8?ie=UTF8&qid=1525722836&sr=8-8&keywords=ssd+m2) ? MSI supports refuses to provide me a satisfatory answer, the onlye answer is that I should go for an authorized center to replace RAM and SSD M2.
Jonny B
April 4, 2019 at 11:01 am
Hi Derek,
Granted its been a couple years since this was posted but it got me through the upgrade , but i have just one tiny problem.
Can't get the damn thing to turn on.
its a GS73VR 6RF Stealth Pro, and it had 8gb of RAM , so i literally mirrored the same ram from the same manucturer bumping it up to 16gig. (if i remove it its still the same)
I've probably stripped about a 1000 laptops in my job now and cannot fathom why everytime i Turn this on I get lights everywhere except the screen. just solid Black.
I seem to recall when I got this out of the box from new a couple years ago, it wouldnt power on either, I think I had to drain the battery completely and restart it afterwards. (which takes time..)
just wondering if you experienced similar or had any tips for this.
It was out of warranty hence why i did the work in the first place.
must have stripped and rebuilt it 10 times now this week and simply cannot get the screen to display anything.
Matt
April 6, 2019 at 11:31 am
I replaced the camera and microphone, and then the screen stopped working. So I completely pulled out the screen connector cable and put it right back in. Then the screen worked again!
I have ordered another screen cable, just in case it's a loose wire that might go bad in the future.
Raul
June 9, 2019 at 9:34 pm
Thank you so much for this guide! I just updated the SSD with an 860 Evo, the m.2 with an 970 evo plus and the ram with 32GB HyperX 2400 and everything is working perfectly. Fantastic guide!
April
July 7, 2019 at 4:34 am
Derek Sullivan: THANK YOU for marking the cables and screws on the photos of the MSI GS73VR interior. They were great guides for dismantling the laptop to replace a failing GPU cooling fan that was making an incredibly noisy racket. I printed the photos and used clear double-sided tape on your marks to affix the screws we removed to the photos, allowing us to keep track of them perfectly. What a time-saving, confidence booster for a delicate DIY repair project that could easily end badly.
FYI for those replacing a GPU fan: The OEM replacement (purchased on eBay for ~$20) is only the front side of the fan unit containing the blade assemblies and power leads. Fortunately, you don't need to remove the entire fan from the heatsink/motherboard assembly to replace it. On the back side of the fan unit, remove the 5 super tiny screws and push the old front half off from the rear. Snap the new front on and secure with the screws. Then replace everything in reverse to complete the repair.
While I didn't look too closely, I'll say the same scenario is true for the CPU fan, too – if that's the fan you need to change. Good luck!
william chan
May 30, 2020 at 1:17 pm
Does the gate have 2 m.2 slots or 1. On the website it says 2x slots.
Derek Sullivan
May 30, 2020 at 8:01 pm
It's been a while but I'm pretty sure there's only one slot. I looked at the pictures and can only see one