Table of Contents
Over a year ago, you might remember that I reviewed the Core m7 version of the HP Spectre x2. Overall, I was pretty pleased with what HP had to offer, but at the time it was slightly inferior to my old Surface Pro 3 and didn’t warrant the similar cost. No longer having a Surface tablet, coupled by a ridiculously good Amazon lightning deal, led me to giving the Core m3 version another shot though.
It’s definitely not a normal thing for me to rebuy a device – I can’t remember a single time I ever have actually. In the case of the Spectre x2 though, I made an exception. I was mainly interested in getting the Intel Realsense camera again. There’s a couple cool things I wanted to do with it (which I’ll explain in a minute) and I also wanted to see if I could live with a Core m3 processor for normal day to day stuff where I didn’t want to lug my GS73VR around.
Rather than just updating the original article, I wanted to write a little more about my experiences over the past month. I also wanted to put in some of the differences in the m3 version and what I learned about how to upgrade the components. This is a relatively dated device (> 1 year old), but I still think it can be useful to many folks, especially at the price points available now. There’s also a niche area with the camera that might interest the makers out there, so keep on reading to see what I’ve learned.
Differences in the m3 Version
The main differences over the m7 version that I reviewed are the processor (obviously), the onboard RAM and the SSD. This m3 version only has 4GB of RAM and a 128GB SSD. The RAM is soldered, but the SSD is upgradable. I’ll get to upgrades soon, but I wouldn’t plan to upgrade unless you’ve taken apart a phone before and are comfortable with it.
Other than that, there aren’t any hardware differences between the two models. It still has an active digitizer, the Intel Realsense camera, LTE capability, etc. Unfortunately, it also has the same crummy speakers. And of course it also comes with the keyboard.
Having the slower processor has some drawbacks with performance, but I’m actually a bit surprised as to how little of a difference I notice in casual activities. I think I had lower expectations because of some terrible performance I’ve witnessed with Core i3 laptops. I forget though that half the problem with those models was the slow HDD bundled with them.
The Core m3-6y30 processor isn’t enough to run heavy programs such as Photoshop or anything, but it’ll run Office apps just fine. Internet browsing and multimedia consumption are also suitable for this model. Some older games will run OK I guess, but I certainly wouldn’t get any high expectations. Once the heat gets too high, the clock speed drops from 2.2Ghz to 900Mhz, which is barely enough for even older games.
I redid some benchmarks on the m3 model. Here’s what I got:
- 3Dmark 13: Sky Diver – 2359, Fire Strike – 458;
- PCMark 08:Home Conventional – 2154, Accelerated – 2696 with 79C max temp;
It’s a pretty significant difference than the m7 version, but as you can see, the results are still pretty decent. Take a look at the gaming benchmarks I reran:
| Title/Graphics settings | fps 720p | fps 1080p |
| Tomb Raider – normal | 30-34 | 16-20 |
| Tomb Raider – low | 43-50 | 28-30 |
| Borderlands 2 – medium | 12-20 | 1-8 |
| Borderlands 2 – low | 15-24 | 1-12 |
| Portal 2 – high | 55-60 | 35-45 |
| Portal 2 – medium | 60 | 45-55 |
| Starcraft 2 – medium | 20-30 | 15-26 |
| Starcraft 2 – low | 46-65 | 46-60 |
I can’t explain why the Tomb Raider results went up. Maybe they had an update that improved overall performance? Other than that though, the results compare with the m7 version pretty much as expected. If you’re ok with playing at low/medium settings on 720p, this is still a decent machine for playing older titles. Don’t expect to play anything newer though.
RealSense Camera
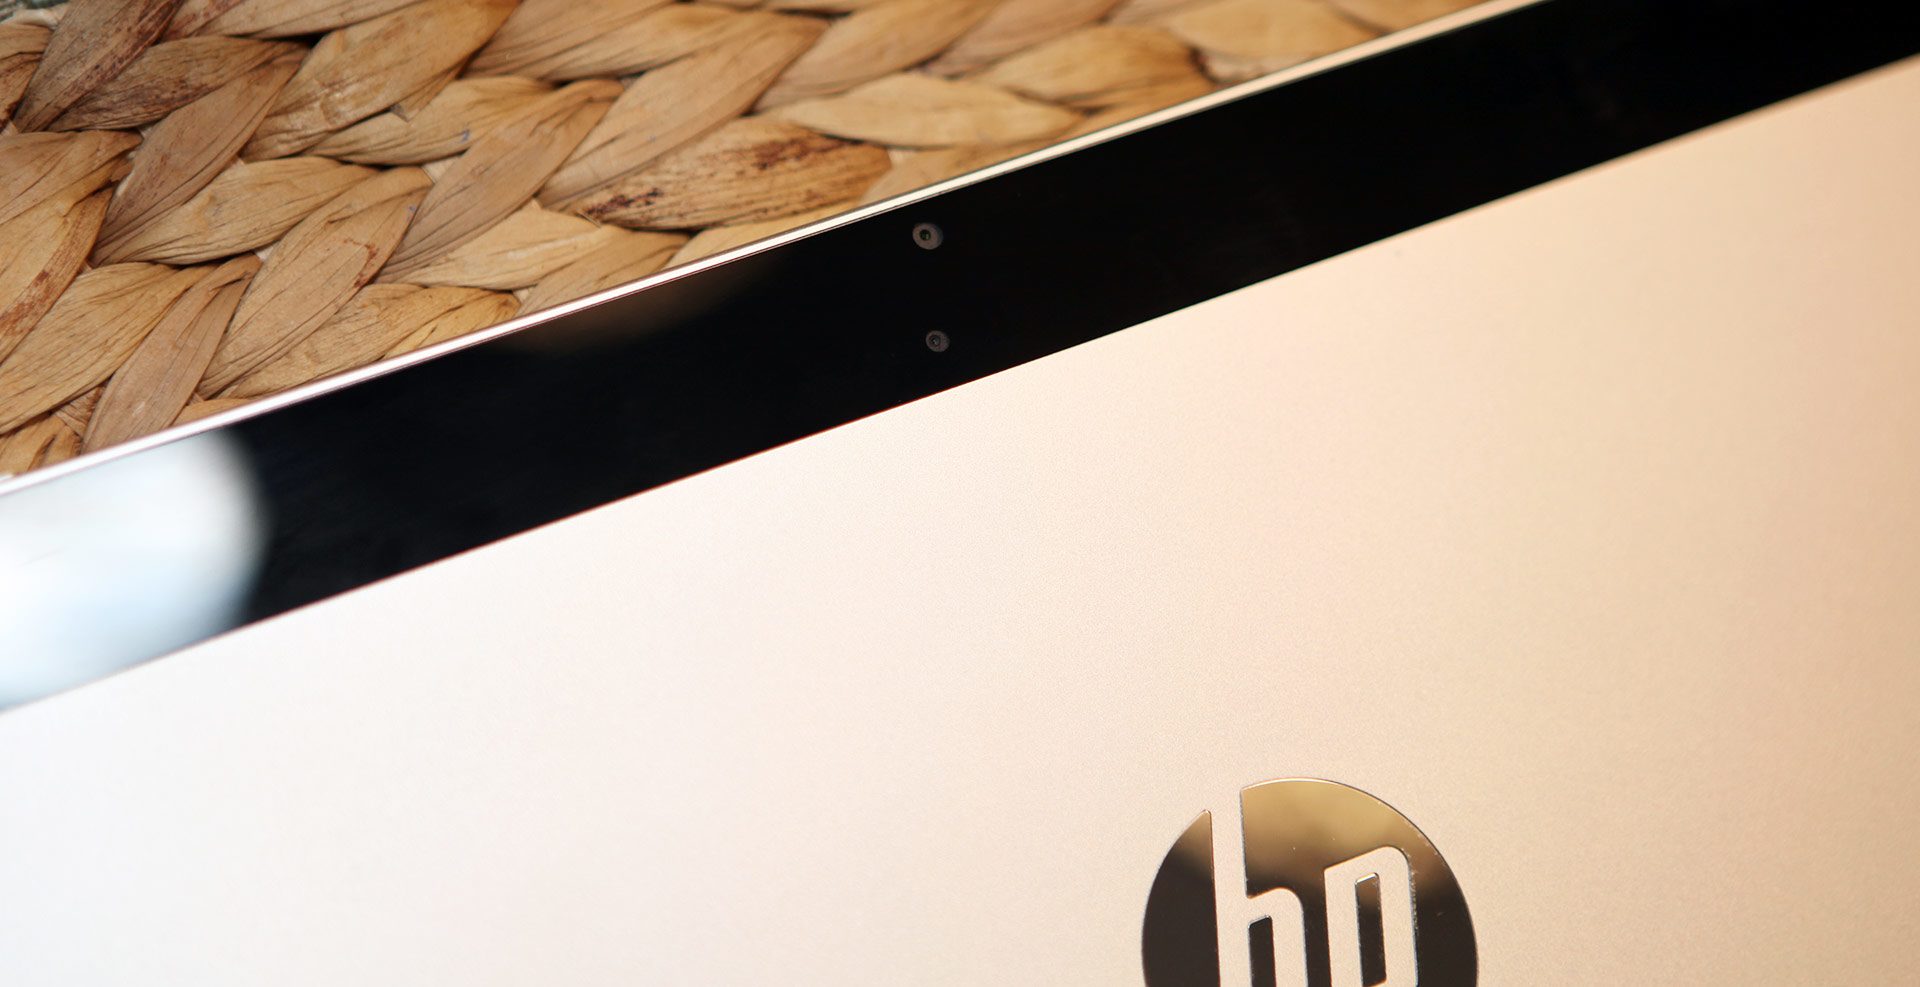
One of the coolest features on the tablet is the built in Realsense camera. It’s similar to the cameras that have the Windows Hello feature, in the sense that there are infrared LEDs that can detect the surfaces of your face. This one is a rear facing camera though, so the Windows Hello feature is disabled.
When I first reviewed the tablet over a year ago, I thought for sure that these RealSense cameras were going to become the new norm. I also just assumed that any camera with the Windows Hello feature would have the same capabilities. This is not the case though. Most of the Windows Hello cameras lack the long range, depth sensing camera, so 3D scanning is not possible on these tablets (Surface Pro 4 for example).
So on those other tablets, 3D scanning software such as itSeez doesn’t operate at all. And that’s one of the contributing factors as to why I gave this one another shot. So why do I want 3D scanning? Well Christmas had a little to do with it actually.
Other than playing with all the latest tech, I also like to build stuff – so naturally I have a 3D printer. :) This camera gave me a pretty cool idea to do in lieu of Christmas cards this year. I was able to scan the busts of my entire family with the built in itSeez software. Then by using the 3D Builder software built into Windows, I was able to combine all the models into one and mount them onto a stand. The output file was then loaded onto my 3D printer.
The result? Well, see for yourselves. It’s a little odd, I admit, but it’s definitely unique. I’m pretty excited to see what projects I can do with it next. I’m still not sure how to scan objects other than faces, but hopefully I can figure it out soon.
Digitizer and Pen
I only touched on it in my original post, mainly because I didn’t have the pen available. I do now though and I can say it works as it should. It’s not as convenient as the Surface Pro pen in terms of the buttons, but it writes pretty much the same.
The build quality of the pen is pretty good. I was a little skeptical because I read some user reviews that mentioned it felt cheap. It could be the x360 model version they were talking about, because this one doesn’t feel cheap to me at all.
It’s a Wacom pen, so most Wacom brand pens will probably work. I specifically bought the HP brand one for this tablet though, which is model t5e12aa#abl. You have to be really careful about which pen you buy because HP also sells a pen for the Spectre x360, which is Synaptics. That pen will not work with the x2 and is mostly the reason for the terrible reviews on both models of the pen.
There are two buttons on the pen, one for erasing and the other for a selection tool. They could probably have a little more tactile feel, but I never had a doubt of when I clicked either button. The tip sensitivity works well in recognizing when I wanted a dark or a light line. It’s not something you’ll want to use for art, such as with the Apple Pencil, but it’s perfectly fine for note taking.
My only complaint with the pen is the constant taps that were registered when I wrote on the tablet using OneNote. The palm rejection seems to only kick in if my whole palm is on the tablet. I don’t remember having this issue with the Surface Pro or the iPad, so it’s probably an area that needs a little improvement.
Upgrades/Disassembly
It’s nice that they included an LTE module in the unit, but I couldn’t make use of it since it was only for Verizon and I’m not a Verizon customer. I tested my AT&T sim with it but it was not recognized. A T-mobile sim I had lying around worked and picked up the LTE tower, but I couldn’t speed test it without an active data plan.
After a little research, I found out that there are only two compatible LTE modules with this model tablet. All other modules are blacklisted by HP’s bios and will not work. So if you’re in the US and an AT&T customer, the module you need is a Huawei ME936 with the part number 756993-005 on the sticker. That part number is important because that’s what indicates it will work with HP. I bought mine for about $55 on eBay.
Getting it is the easy part – installing it is a whole different animal. The nice thing is HP actually has disassembly instructions to guide you on what to do. Since I took mine apart, I took some pictures to help guide anyone that wants to do the same thing. In short, it’s not too hard, but you need to have a gentle touch and a little patience. If you’ve taken apart a late gen iPhone or especially an iPad, this will be pretty easy for you.
Before venturing on, you must know that myself or anyone else associated with Ultrabookreview.com can’t be held responsible or liable for any damage that you might incur on your unit during the upgrade process, so proceed at your own risk and only if you know what you’re doing!
I’d recommend having phone/tablet disassembly tools handy. I personally use the kit from iFixit, but you can get away with the cheap disposable tools they sell on eBay. The first thing you’ll want to do is power off the machine and remove the keyboard.
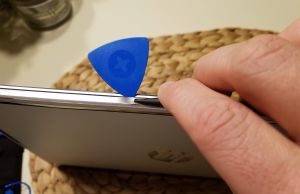
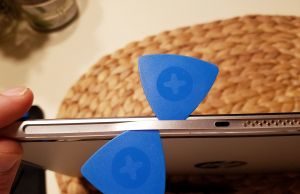
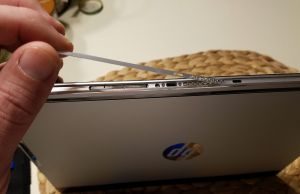
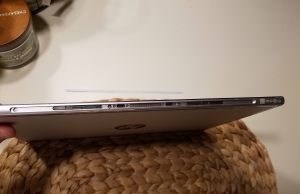
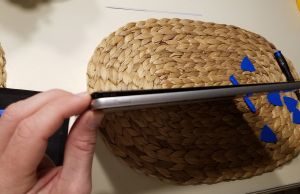
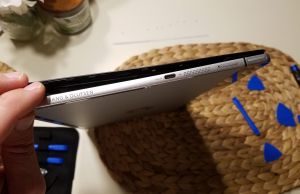
On the bottom edge where the keyboard attaches, there is a plastic strip that is adhered to the tablet. A small pick in one of the alignment joints will separate the two. I just stuck it in and lifted very carefully on one side. You can use thin guitar picks to work it up slowly and hold your place. Once you get one side up, you can start on the other side. Try not to bend the strip too much and make creases. This part probably took me 5 minutes. Place the strip sticky side up, somewhere safe.
Underneath are 8 phillips screws. Take all 8 out and put them somewhere save. They all looked the same size to me but I kept them in order, just in case. Once you get the screws off, the hard part begins.
The screen is held onto the tablet with mostly clips but there is some adhesive in some spots that makes it pretty difficult to get apart. Particularly on the bottom, which is where you must start. Basically, you need to go slow. HP’s instructions make it look easy, but you’ll want to be careful not to go too fast or bend the screen too much or else you’ll risk breaking the glass.
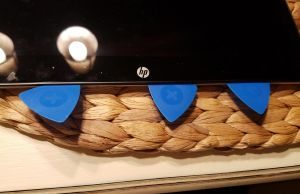
I started in the center bottom, since there appeared to be no adhesive. I used some of the guitar picks to separate the screen and worked my way outwards. Once you get the adhesive apart from the tablet, it all starts to work out. Again, go slow. Once you get to the sides, the clips are your next battle.
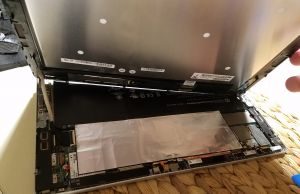
The clips take a little more force to get apart. Don’t be afraid to use the picks a little more aggressively in the corners to get the first one released. Once you get that first corner clip undone though, the rest comes apart easily. Just work one clip at a time, all the way around, until they are all undone. Once you have the screen completely detached, there’s a single cable that needs to be detached. Just lift the black lever 90 degrees and the connector comes right off.
Note that there might have been some adhesive that stuck to the screen portion instead of the tablet portion. If that happened, it’s best just to leave it alone. If for any reason it detached a little during disassembly and then bunched up, you’ll need to spread it out again. Reason I’m saying this is because if you leave it bunched up in a ball, it’ll cause uneven pressure and will definitely result in some backlight bleed on the screen once you reassemble it.
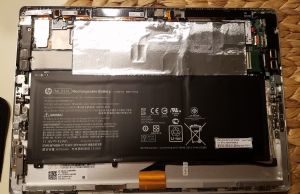
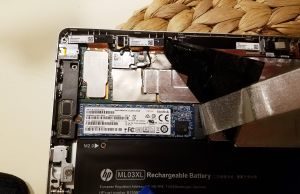
So now that you have the tablet portion exposed, you’ll have direct access to the battery and an extremely tiny Wifi module. You’ll also see why the sound is so lousy…. Not only did they choose two tiny speakers on each side instead of a single normal size speaker, they are facing directly against the screen instead of towards the speaker grills. Missed opportunity in that part of the design I guess.
Anyways, in order to access the M.2 slot, you’ll need to peel back the tape on the left hand side. It’s not tough to remove, but if you’re trying to keep things from looking “untouched” when you’re done, think again. The tape does not look anything the same when you restick it on. Once you get the M.2 slot exposed, replacing the drive is as simple as can be. Just remove the screw and swap out the drives.
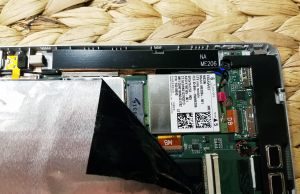
If you’re replacing the cellular module like me, it’s located on the upper right. Same deal – peel back the tape until it’s exposed. If you’ve changed out Wifi modules before, this is the exact same process. You have to remove both antenna wires from the module, then remove the single screw. Replace the module and the screw, as it was before. Then reattach the antenna wires to the new module. It takes a little precision to get the antenna wires snapped in properly, so take your time and make sure they are attached.
At this point, it’s best to test things out and make sure everything is working. Insert your new sim card(if applicable), reattach the screen connector and power the machine on. If you only replaced the cellular module, you’ll be able to see it right when you boot into Windows. If you replaced the SSD too, you’ll have to start a Windows install and get to the connect to a network step to see if both are working properly. For me, it showed AT&T right away and at that point I powered it back down.
Reassembly is pretty simple. Align the screen with the tablet and start with the top clips. Then work your way on the sides until you get to the adhesive on the bottom. The bottom might not stick as well, depending on how much you meddled with the adhesive. I wouldn’t worry about it too much because that’s what the screws are for. Just make sure you pinch the tablet and screen gaps when you put the screws on and you should be fine.
Once all the screws are back on, you’ll need to put the protective adhesive strip back on. Assuming you kept it straight and didn’t break anything, it should go right back on. I left my keyboard attached overnight, just in case, and it’s never come back off for me. In the event you do break it or it doesn’t go back on, you can order a replacement from HP. Frankly, it’s a rip off what they charge, so I’d just say go without it. It’s not necessary at all to have and it’s only for looks.
At this point, you’re done. Hopefully it all worked out well.
Availability
The Core m3 version I bought is available at Amazon. At the time of writing this article, the price is around $400 but I’ve seen it hover between that and $350 over the past couple weeks. I actually got mine on a Lightning deal for $300, which was a real bargain, especially considering it also came with a free year subscription to Prime Photos. I wouldn’t hold my breath expecting that deal to come back though.
Wrap up
Hopefully this article helps shine some light on the portions I didn’t touch on in my initial review. Like I said before, my opinions on the laptop haven’t really changed. I really like it in many ways, but the Surface Pro 3 and 4 is still superior in a couple categories.
But if you can settle for the m3 version of the tablet, I really think this is a good buy over the Surface Pro 4 m3 version. Not only does it come with a keyboard cover, but you also get a Realsense camera and cellular service – all for nearly half the cost. The only thing you have to sacrifice is the crummy speaker quality and the reduced screen resolution.
If you have any further questions or comments, please get in touch in the section below.



wad
April 23, 2017 at 10:03 am
How's the battery life on it? And the prices I see at amazon are around 450 can you link me a cheaper price thanks.
Derek Sullivan
April 23, 2017 at 11:21 am
The battery life is decent, considering it's a tablet. I get roughly 4 hours with typical productivity use, which is mainly what I use it for.
Unfortunately, I don't know of any better prices. I got mine as a lighting deal for a lot cheaper than that but there's no telling if they'll do that again.
Steven
April 26, 2017 at 6:11 pm
Thanks for updating your thouguhts on the HP Spectre X2 12. I didn't notice this little unit for quite some time after it was offered for sale. Now I'm seeing a whole bunch of these Surface knock offs on the market, or coming on the market soon. I picked up an M3 version at Amazon…ran me 411.56. It has to be the best purchase I've made in a long time, I didn't expect an M3 device to run this well. I'm not much of a gamer, but Paladins(beta) and Hearthstone run very well on it. Overall, just a great device.
I also wanted to mention they have new(er) usb-c docks that recently came out, I plan on picking up a docking station for mine so I can hook up a monitor to it when I'm sitting at the desk.
The little devices are essentially a tablet, a laptop…and with a dock…can easily be turned into a desktop as well.
I absolutely love mine. I can't say it enough.
Best Regards,
Steven
Gerardo
February 1, 2018 at 8:57 am
Hi, Im a music teacher from Argentina and these days students send their work through pdf files. Im needing some kind of machine that allows me to edit PDF with pen and save the result. Just adding numbers and letters and markings here and there :)
Also can do some little multitasking like surf the web for showing audio examples to studentes (using external speakers), and can run Score editing programs like, Sibelius or Finale (while we dont use any audio libraries they doesnt demand more than Word, or Excel, or a PDF editor like Nitro).
These days, the m5 model is at $400. Would you recomend me these machine. I would like to spend 500 for the whole package (machine, pen, and keyboard, and usb c adapter if needed).
Thank you!
Derek Sullivan
February 1, 2018 at 9:44 am
That's an amazing deal! I would totally jump on that one. It should be fine for PDF editing, but you might need to use a third party software if Adobe doesn't support the pen (I'm honestly not sure if they do or not)
I'm also not sure how the docking station would work though. It's not a thunderbolt connection, so the monitors might have limited resolution and framerates.